Paint Wizard
|
Paint Wizard |
The Paint Wizard can be used to paint any Shergood Aviation aircraft, and securely package paints from it for resale. The Paint Wizard kit includes the Paint Wizard itself, and a V3.0 Shergood Paint Bucket. Unlike the 2.0 paint kit system, no notecards or drop-in textures are used to configure it. It is programmed only from the Paint Wizard. Paints may be applied to an aircraft directly from the Paint Wizard, or through paint cans programmed by it.
1 Basic Operation
1.1 Selecting a Configuration
When you first rez the Paint Wizard, no active configuration is selected. The text "select configuration..." will be shown on the display bar. Click the display bar, to get a menu of possible configurations. A configuration is a combination of an aircraft, and a specific paint for that aircraft. The Paint Wizard comes with configurations for all SA aircraft at the time the kit was published. In addition, you may also add your own configurations. This will be described in Adding Configurations.
Use the "NEXT>>" and "<<PREV" buttons to page through the selections. Once you select a configuration, the Paint Wizard will load the configuration, and configure the wizard for editing that paint. Selecting the ":RESET:" option will reset the scripts and load any newly added configurations.
1.2 Editing a Paint
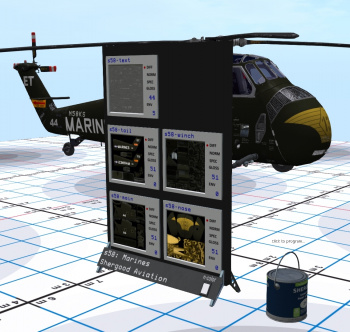
Once a configuration has been loaded, the backboard of the Wizard will be populated with tiles, one tile for each texture used in the paint (see Figure 1). Each tile has the following parts:
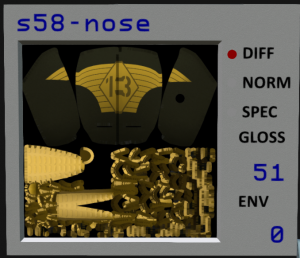
- Label - The name of the texture is shown in blue at the top of the tile.
- Texture Box - A large box using most of the tile space below the label shows the texture that is assigned to that name.
- Material Selector - A selector on the right side of the tile with settings DIFF, NORM and SPEC lets you select whether to view the diffuse layer, the normal layer or specular layer for a texture.
- Specular Parameters - Two numbers labeled GLOSS and ENV let you select the Glossiness and Environment values for the specular layer.
To edit a texture, simply edit the texture applied to the Texture Box with the normal SL edit tools. To select the material layer, click on DIFF, NORM or SPEC to select the layer. A box at the bottom labeled "n-color" can be used to set the color applied to n-numbers on the aircraft.

