Difference between revisions of "KeliWagon"
(→Main Menu) |
(→Main Menu) |
||
| Line 187: | Line 187: | ||
====Main Menu==== | ====Main Menu==== | ||
| − | |||
| − | |||
| − | |||
| − | |||
| − | |||
| − | |||
{| class=wikitable | {| class=wikitable | ||
| Line 198: | Line 192: | ||
!Description | !Description | ||
|- | |- | ||
| − | |<span class= | + | |<span class=sa-mbutton>Battery</span> |
|Open the "Battery" menu for configuring battery properties. | |Open the "Battery" menu for configuring battery properties. | ||
|- | |- | ||
Revision as of 02:54, 25 October 2024
|
KeliWagon |
1 Introduction
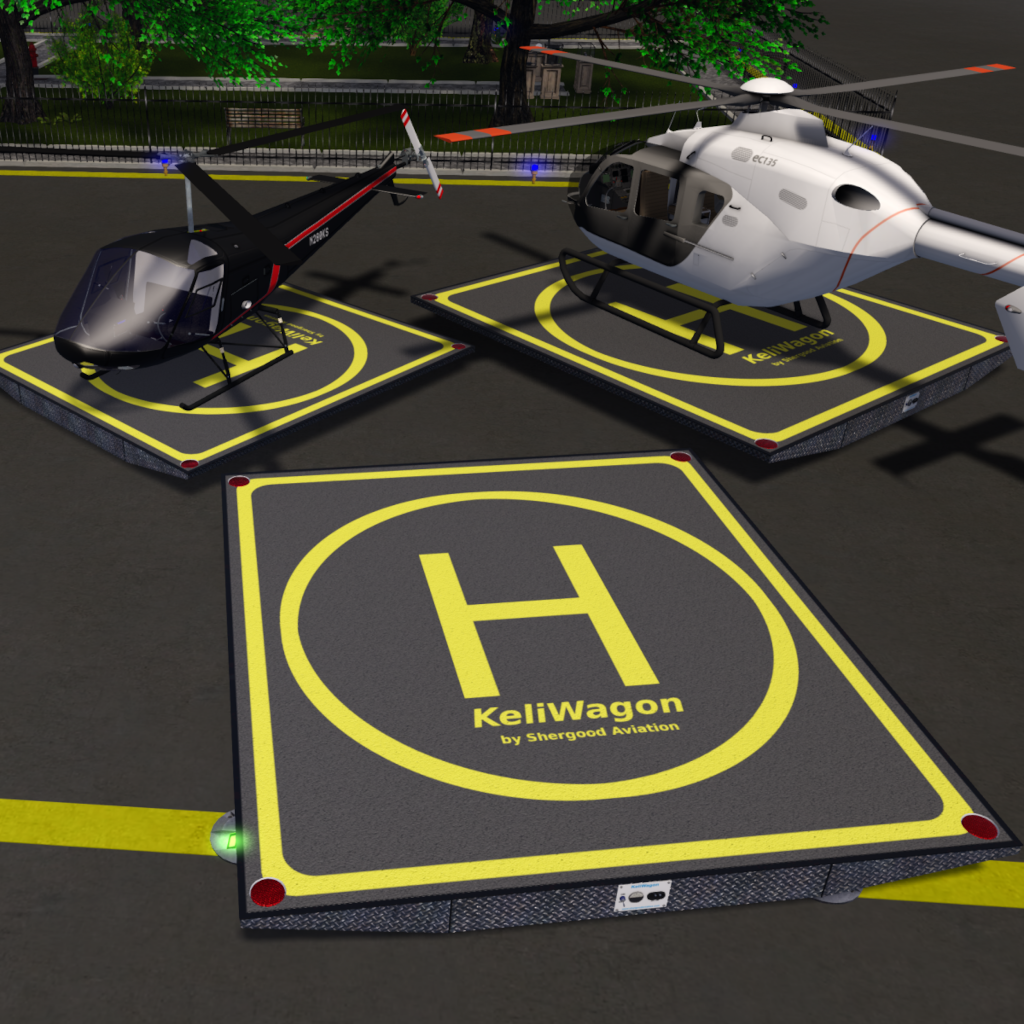
The KeliWagon is the ultimate mobile landing platform for your helicopter. It is your go-to tool for effortlessly moving your skid equipped Shergood helicopters into and out of your hangar and into position for flight. Whether you’re storing your helicopter in a hangar, relocating it for the next mission, or simply showing off your latest aircraft, the KeliWagon makes the process smooth and efficient.
With a fully mesh design, animated and castering wheels, and remote steering via HUD, the KeliWagon delivers unparalleled functionality and realism. It’s not only Sim Crossing Capable, but also slope-capable, meaning you can move your helicopter across varying terrains with confidence. Plus, its integration with the Shergood GPU ensures seamless recharging, with a built-in battery level gauge to keep you in control at all times.
Whether you’re piloting remotely or directly from your helicopter, the KeliWagon offers a sleek and intuitive solution for all your heli-moving needs.
Features include:
- Includes Three Sizes (Small, Medium, Large)
- Compatible with all Shergood Skid Helicopters
- Ridable with Click to Change Standing
- Remote Steering with HUD
- Drivable Remotely or While in Helicopter
- Sim Crossing Capable
- Animated and Castering Wheels
- Slope Capable
- Recharges with Shergood GPU
- Battery Level Gauge
- Access Controls
- Fully Mesh Design
- Both PBR and Standard Materials
- Landing Lights
2 Operating Limitations
Usage of this product is subject to the following limitations:
- Hud Maximum Range - 100m
- Optimized for use with skid equipped Shergood aircraft
3 Basic Usage
3.1 Helicopter Set-Up
To set up a helicopter for use with the KeliWagon:
- Drop the included "-sa-keliwagon-aircraft vx.x.x" script into your skid equipped Shergood helicopter.
Once the script has been dropped in the helicopter, you are ready to go.
3.2 Engaging Helicopter with Pad
The KeliWagon is designed to be as simple and seamless to use as possible. In normal operation this means:
- Land the aircraft on the pad.
- Exit the aircraft to make it go non-physical (or select "Park" from the aircraft menu).
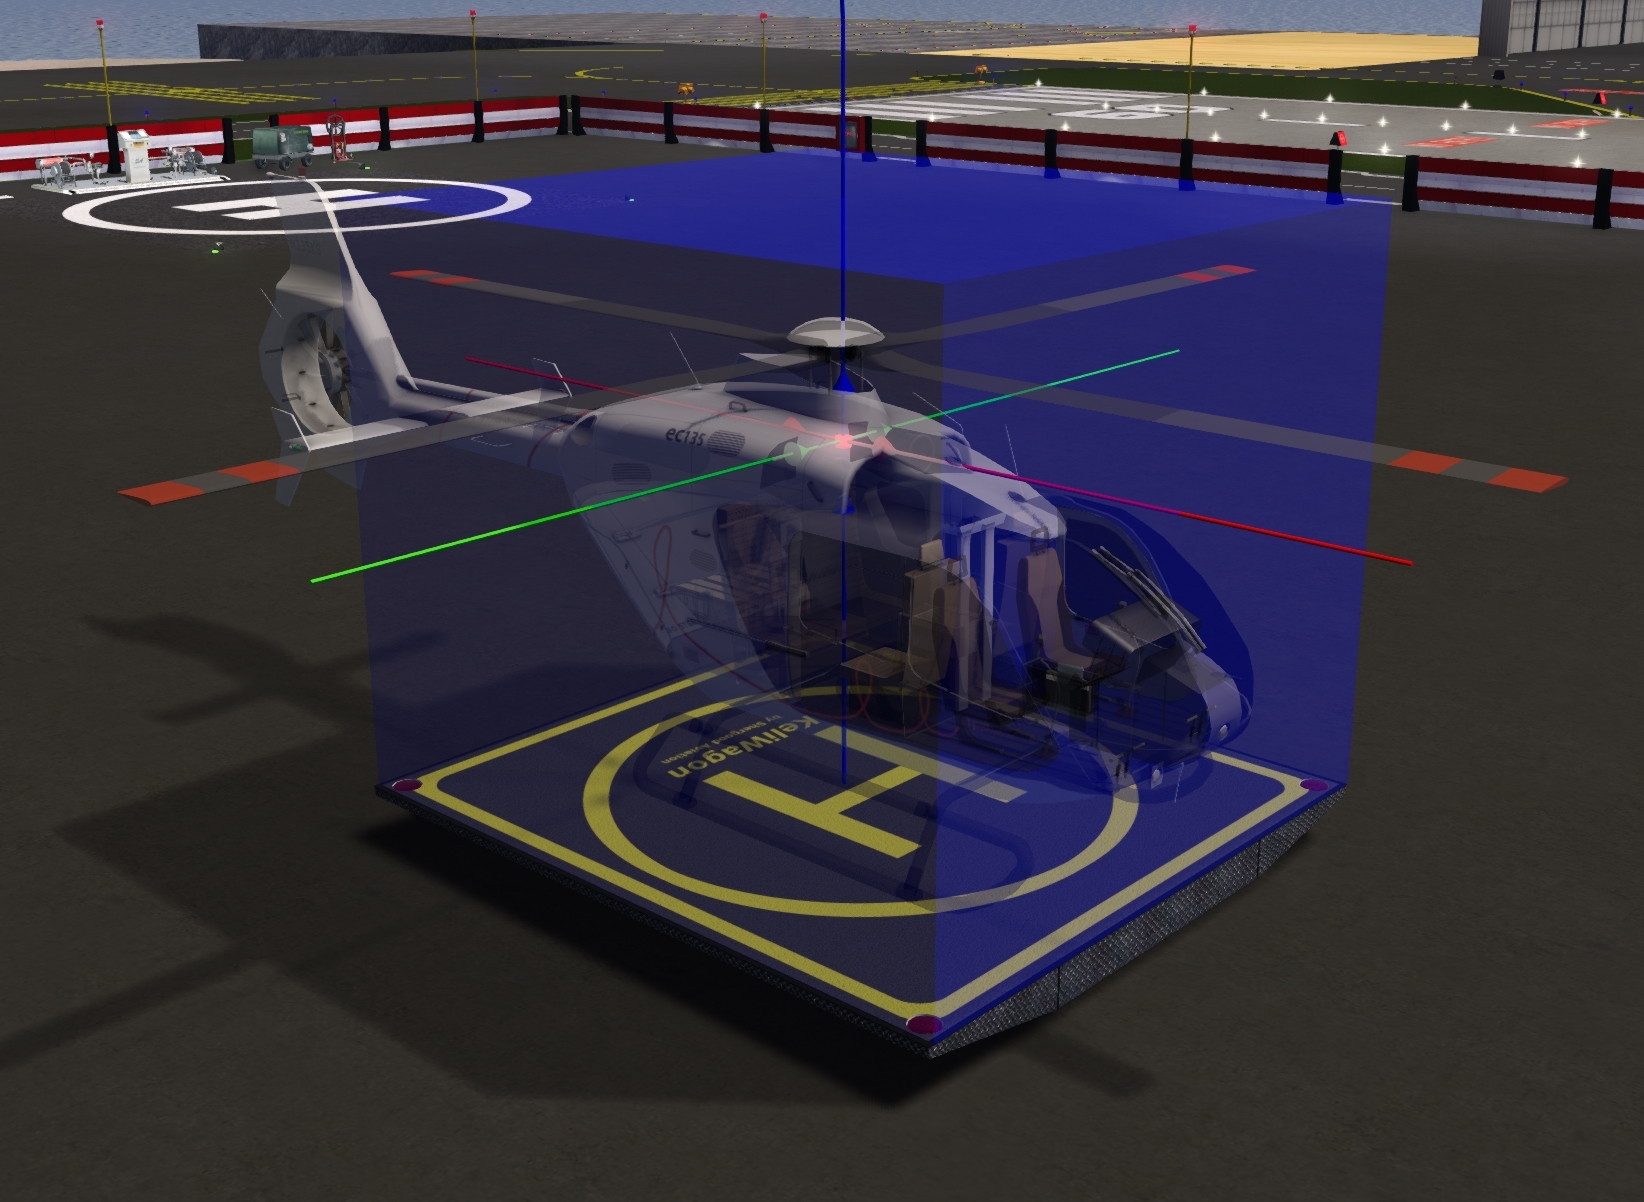
More specifically, KeliWagon enabled objects "engage" with a pad when they become non-physical with the root prim inside the detection volume of the pad. The detection volume is anywhere over the surface of the pad up to about 5 meters as shown in Figure 1. Engagement occurs when:
- The helicopter transitions from physical to non-physical inside the detection volume.
- The helicopter is edited while non-physical into the detection volume.
- The pad is edited such that the helicopter is inside the detection volume.
3.3 Pad Operation
The Pad is operated through the use of a HUD. To connect a HUD to a pad and control it, use the following procedure:
- Wear the included KeliWagon HUD (or get the HUD from the pad menu).
- Click on the KeliWagon you wish to control to connect the Hud to the Pad. The status light on the hud will turn green.
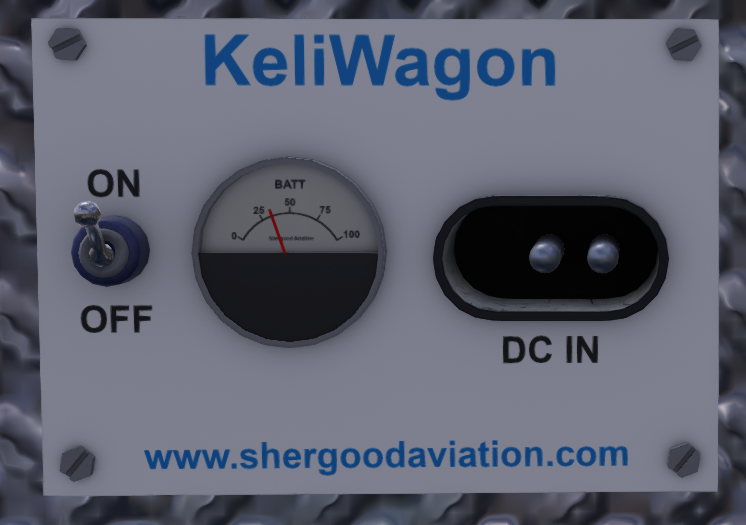
- Turn on the power switch on the pad (see Figure 3).
- Turn on the power switch on the HUD.
- Use the controls to move the pad as desired.
- Turn power off when done.
The pad may be operated:
- While standing within 100m of the pad.
- While sitting in the aircraft, as long as it is non-physical (Parked)
- While sitting/standing on the pad itself.
3.4 Pad Permissions
In order to use your helicopter on a pad, the helicopter and pad must have mutual permissions to use each other. Permissions for
- the helicopter control which pads can be used to move it; and permissions for
- the pad control who can control that pad through a HUD.
Possible permission settings are:
| Permission | Description |
|---|---|
| Public | Anyone |
| Group | Members of the same group as the pad (or helicopter) |
| Friend | Anyone on the friend list of the pad (or helicopter) |
| Owner | Only the owner |
3.4.1 Setting Pad Permissions
To set the permissions on the KeliWagon:
- Click the control panel (see Figure 3) to access the main menu
- Select "Access(Pad)"
- Select the desired permission level for access to the pad
The selected pad permission will control who is able to use a HUD to control the pad.
3.4.2 Setting Aircraft Permissions
To set the permissions on an aircraft:
- Land the aircraft (owned by you) on a pad (owned by you)
- Click the control panel (see Figure 3) to access the main menu
- Select "Access(A/C)"
- Select the desired permission level for access to the aircraft
The selected permission will control who's pads can move your aircraft. By cautious about setting Public permissions on an aircraft. With public permissions, any user could slide a pad under your aircraft to move it without your permission.
3.4.3 Temporary Permissions
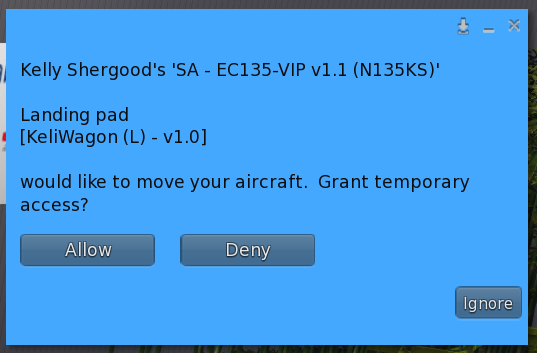
The owner of an aircraft can grant temporary permissions to a specific pad when you land on it. If you land on a pad that does not have permission to move your aircraft, a dialog will appear allowing you to grant or deny permission for that pad to move your aircraft. The permissions persist until:
- The aircraft becomes physical.
- The aircraft is edited.
- The pad is edited.
When any of these things happen, you will need to grant temporary permissions again.
3.5 Charging
The KeliWagon is battery powered and will require periodic recharging. A gauge on the KeliWagon control panel (see Figure 3) shows the current battery charge in percent. The battery will drain when the motors are engaged (50 amps), the lights are on (5 amps), and anytime the power is on to support the control circuitry and transceiver (0.1 amps). To charge:
- Park the KeliWagon near your Shergood Ground Power unit (GPU).
- Connect the GPU to the KeliWagon.
- Wait for the battery gauge to read 100%
When connecting the GPU, the pad will show in the GPU as "Pad_XXX" where "XXX" is a three digit number randomly assigned when you rezed the pad.
3.6 Riding on the Pad
You can "ride" on the pad directly by sitting on it. Up to 4 avatars may ride the pad. While on the pad you can use the following chat commands:
| Command | Description |
|---|---|
| cv | toggle between an unscripted camera and a "behind view" |
| cv2 | toggle between an unscripted camera and an "overhead view" |
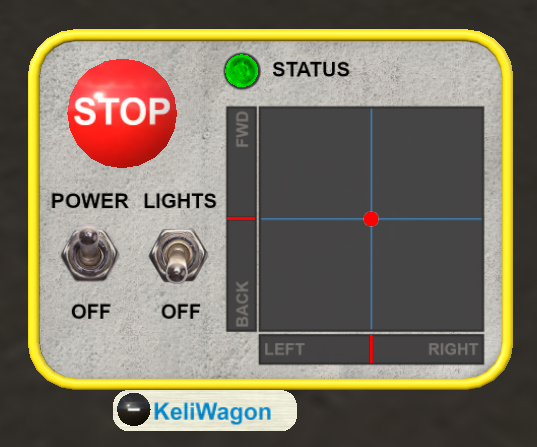
4 HUD
The HUD has an operating range of 100 meters and include the following controls and indicators:
- Emergency Stop button - Immediately stops all movement of the Keliwagon, Cycle the power switch to reset.
- Status LED - Green indicates connected and operating normally. Red indicates a fault.
- Power Switch - Activates Power to the Keliwagon and enables hud controls.
- Lights Switch - Activates the four red landing lights on the Keliwagon.
- Forward/Reverse Control - Controls the movement in the forward/reverse direction only. The red bar indicates current control position, click and drag to move, the control will return to the neutral position when released.
- 2D control - Controls the movement of the Keliwagon in both forward/reverse as well as turning left/right. The red dot indicates the currnet control postion, click and drag the dot to move the control. The control will return to neutral when released.
- Left/Right Control - Controls the movement of the Keliwagon in the left/right direction only. Moving the control will cause the Keliwagon to pivot in the indicated direction. The red bar indicates current control position, click and drag to move, the control will return to the neutral position when released.
- Hide/Show Button - Hides or shows the main portion of the hud.
5 Menus
Menus are accessed by clicking the control panel at the back of the pad (see Figure 3).
5.1 Main Menu
| Button | Description |
|---|---|
| Open the "Battery" menu for configuring battery properties. | |
| Get | Open the "Get" menu for getting pad related items. |
| CONNECT | Connect the HUD worn by the user accessing the menu. (Performs same function as clicking the pad anywhere other than the control panel) |
| Access(Pad) | Configure access permissions for the pad. |
| Access(A/C) | Configure access permissions for the aircraft sitting on the pad. |
